Installatie van GLPI op Ubuntu Linux
Deze tutorial zal je alle stappen tonen die nodig zijn om GLPI op Ubuntu Linux te installeren.
1. Installeer MySQL op Ubuntu Linux
GLPI vereist een databasesysteem om alle configuratie op te slaan.
Gebruik de opdracht Ubuntu APT om de MySQL-server te installeren.
# apt-get update
# apt-get install mysql-server mysql-client
Gebruik de volgende opdracht om toegang te krijgen tot de MySQL-serviceconsole.
# mysql -u root -p
Op de MySQL-console moet u de volgende taken uitvoeren:
• Maak een database met de naam glpi.
• Maak een MySQL-gebruikersaccount met de naam glpi.
• Geef volledige controle over de glpi-database aan de glpi-gebruiker.
CREATE DATABASE glpi CHARACTER SET UTF8 COLLATE UTF8_BIN;
CREATE USER ‘glpi’@’%’ IDENTIFIED BY ‘kamisama123’;
GRANT ALL PRIVILEGES ON glpi.* TO ‘glpi’@’%’;
FLUSH PRIVILEGES;
quit;
2. Installeer Apache op Ubuntu Linux
GLPI vereist een webserver met PHP-ondersteuning om zijn webpagina’s te presenteren.
Gebruik de opdracht Ubuntu APT om de Apache-server te installeren.
# apt-get update
# apt-get install apache2 php7.2 php7.2-mysql libapache2-mod-php7.2
Installeer de vereiste PHP-modules van Apache.
# apt-get install php7.2-json php7.2-gd php7.2-curl php7.2-mbstring php-cas
# apt-get install php7.2-xml php7.2-cli php7.2-imap php7.2-ldap php7.2-xmlrpc php-apcu
Schakel Apache mod_rewrite in.
Bewerk het bestand apache2.conf.
# a2enmod rewrite
# vi /etc/apache2/apache2.conf
Voeg de volgende regels toe aan het einde van apache2.conf
<Directory /var/www/html>
AllowOverride All
</Directory>
Zoek de locatie van het PHP-configuratiebestand op uw systeem.
Bewerk het php.ini-configuratiebestand.
# updatedb
# locate php.ini
# vi /etc/php/7.2/apache2/php.ini
Uw PHP-versie is misschien niet dezelfde als die van ons.
Uw PHP-configuratiebestandslocatie is mogelijk niet dezelfde als die van ons.
Hier is het bestand met onze configuratie.
file_uploads = On
max_execution_time = 300
memory_limit = 256M
post_max_size = 32M
max_input_time = 60
max_input_vars = 4440
Start de Apache-webserver handmatig opnieuw.
# service apache2 restart
# service apache2 status
Controleer de Apache-servicestatus.
● apache2.service – The Apache HTTP Server
Loaded: loaded (/lib/systemd/system/apache2.service; enabled)
Drop-In: /lib/systemd/system/apache2.service.d
└─apache2-systemd.conf
Active: active (running) since Mon 2018-12-03 03:41:12 -02; 2 days ago
3. Installeer GLPI op Ubuntu Linux
Nadat de MySQL- en de Apache-configuratie zijn voltooid, kunnen we de GLPI-installatie starten.
Download de nieuwste GLPI-versie en pak het pakket uit.
# cd /tmp
# wget https://github.com/glpi-project/glpi/releases/download/9.3.3/glpi-9.3.3.tgz
# tar -zxvf glpi-9.3.3.tgz
Verplaats de GLPI-map naar de hoofdmap van uw Apache-hoofdmap.
Geef de gebruiker van www-data de volledige controle over de GLPI-directory en de bijbehorende bestanden.
# mv glpi /var/www/html/
# chown www-data.www-data /var/www/html/glpi/* -R
Maak een Apache-configuratiebestand met de naam glpi.conf.
# vi /etc/apache2/conf-available/glpi.conf
Hier is het bestand met onze configuratie.
<Directory /var/www/html/glpi>
AllowOverride All
</Directory>
<Directory /var/www/html/glpi/config>
Options -Indexes
</Directory>
<Directory /var/www/html/glpi/files>
Options -Indexes
</Directory>
Schakel de nieuwe configuratie op Apache in.
# a2enconf glpi
Start de Apache-webserver handmatig opnieuw.
# service apache2 restart
4. Configureer GLPI op Ubuntu Linux
Open uw browser en voer het IP-adres van uw webserver plus / glpi in.
In ons voorbeeld is de volgende URL in de browser ingevoerd:
• http:/.200.200.200/glpi
De GLPI-installatiewizard zal worden gepresenteerd.
Selecteer de gewenste taal.

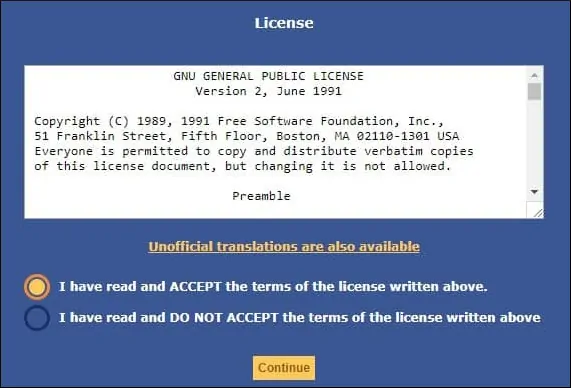
Accepteer de GLPI-licentievoorwaarden

Klik op de knop Installeren.

Klik op de knop Doorgaan.

Voer de MySQL-inloggegevens in die vereist zijn om verbinding te maken met de GLPI-database

Selecteer de GLPI-database en klik op de knop Doorgaan.

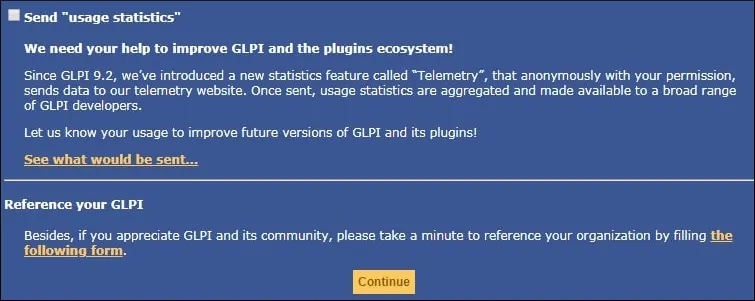
Klik op de knop Doorgaan.

Noteer de standaardinlogins en wachtwoorden.
Klik op de knop GLPI gebruiken.

Voer in het scherm Aanmelden het GLPI-account en wachtwoord in.

Na een succesvolle aanmelding wordt het GLPI-dashboard weergegeven.

Gefeliciteerd, GLPI is op uw systeem geïnstalleerd.
Verwijder het GLPI-installatiebestand op de Linux-console.
# rm /var/www/html/glpi/install/install.php
Leave A Comment
You must be logged in to post a comment.