Nginx Installeren op Ubuntu Linux
Deze tutorial zal je alle stappen laten zien die nodig zijn om Nginx op Ubuntu Linux te installeren.
Deze tutorial is getest op Ubuntu 18.04.
1. Installeer Nginx op Ubuntu Linux
Gebruik de opdracht Ubuntu APT om de Nginx-server te installeren.
# apt-get update
# apt-get install nginx
Start de Nginx-webserver handmatig opnieuw.
# service nginx restart
# service nginx status
Controleer de Nginx-servicestatus.
● nginx.service – A high performance web server and a reverse proxy server
Loaded: loaded (/lib/systemd/system/nginx.service; enabled; vendor preset: enabled)
Active: active (running) since Sat 2018-12-29 04:29:22 UTC; 1h 17min ago
Docs: man:nginx(8)
Process: 2233 ExecStart=/usr/sbin/nginx -g daemon on; master_process on; (code=exited, status
Process: 2221 ExecStartPre=/usr/sbin/nginx -t -q -g daemon on; master_process on; (code=exite
Main PID: 2238 (nginx)
Tasks: 2 (limit: 1152)
CGroup: /system.slice/nginx.service
├─2238 nginx: master process /usr/sbin/nginx -g daemon on; master_process on;
└─2239 nginx: worker process
Open uw browser en voer het IP-adres van uw webserver in.
In ons voorbeeld is de volgende URL in de browser ingevoerd:
• http://200.200.200.200
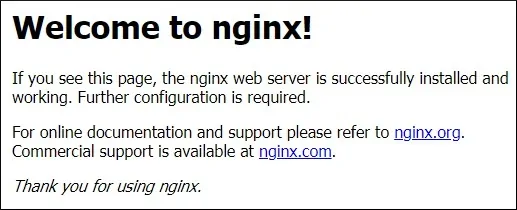
De Nginx-welkomstpagina wordt gepresenteerd.

De Nginx-webserver is met succes geïnstalleerd.
2. Installeer MySQL op Ubuntu Linux
Bijna elke website heeft een databasesysteem nodig om alle configuratie op te slaan.
Gebruik de opdracht Ubuntu APT om de MySQL-server te installeren.
# apt-get update
# apt-get install mysql-server mysql-client
Gebruik de volgende opdracht om toegang te krijgen tot de MySQL-serviceconsole.
# mysql -u root -p
3. Voeg PHP-ondersteuning toe aan Nginx
Nginx heeft een extern programma nodig om PHP-ondersteuning toe te voegen.
Gebruik de opdracht Ubuntu APT om de vereiste PHP-pakketten te installeren.
# apt-get update
# apt-get install php7.2-fpm
Optioneel. Gebruik de volgende opdracht om de meest gebruikte PHP-modules van Apache te installeren.
# apt-get install php7.2-xml php7.2-curl php7.2-gd php7.2-mbstring php7.2-mysql
# apt-get install php7.2-bz2 php7.2-zip php7.2-json php7.2-readline
Zoek de locatie van het PHP-configuratiebestand op uw systeem.
Bewerk het php.ini-configuratiebestand.
# updatedb
# locate php.ini
# vi /etc/php/7.2/fpm/php.ini
Uw PHP-versie is misschien niet hetzelfde als die van ons.
Uw PHP-configuratiebestandslocatie is mogelijk niet dezelfde als die van ons.
Hier is het bestand met onze configuratie.
file_uploads = On
max_execution_time = 300
memory_limit = 256M
post_max_size = 32M
max_input_time = 60
max_input_vars = 4440
Bewerk het standaardwebsiteconfiguratiebestand van Nginx.
# vi /etc/nginx/sites-available/default
Hier is het originele bestand, vóór onze configuratie.
server {
listen 80 default_server;
listen [::]:80 default_server;
root /var/www/html;
index index.html index.htm index.nginx-debian.html;
server_name _;
location / {
try_files $uri $uri/ =404;
}
}
Hier is het nieuwe bestand met onze configuratie.
server {
listen 80 default_server;
listen [::]:80 default_server;
root /var/www/html;
index index.php index.html index.htm;
server_name _;
location / {
try_files $uri $uri/ =404;
}
location ~ .php$ {
include snippets/fastcgi-php.conf;
fastcgi_pass unix:/var/run/php/php7.2-fpm.sock;
}
}
Controleer of uw Nginx-configuratiebestand geen fout bevat.
# nginx -t
nginx: the configuration file /etc/nginx/nginx.conf syntax is ok
nginx: configuration file /etc/nginx/nginx.conf test is successful
Start de PHP-service opnieuw.
Start de Nginx-service opnieuw.
# service php7.2-fpm restart
# service nginx restart
Om onze configuratie te testen, maken we een eenvoudige PHP-testpagina.
# vi /var/www/html/test.php
Hier is de inhoud van het test.php-bestand.
<?php phpinfo(); ?>
Open uw browser en voer het IP-adres van uw webserver plus /test.php in.
In ons voorbeeld is de volgende URL in de browser ingevoerd:
• http://200.200.200/test.php
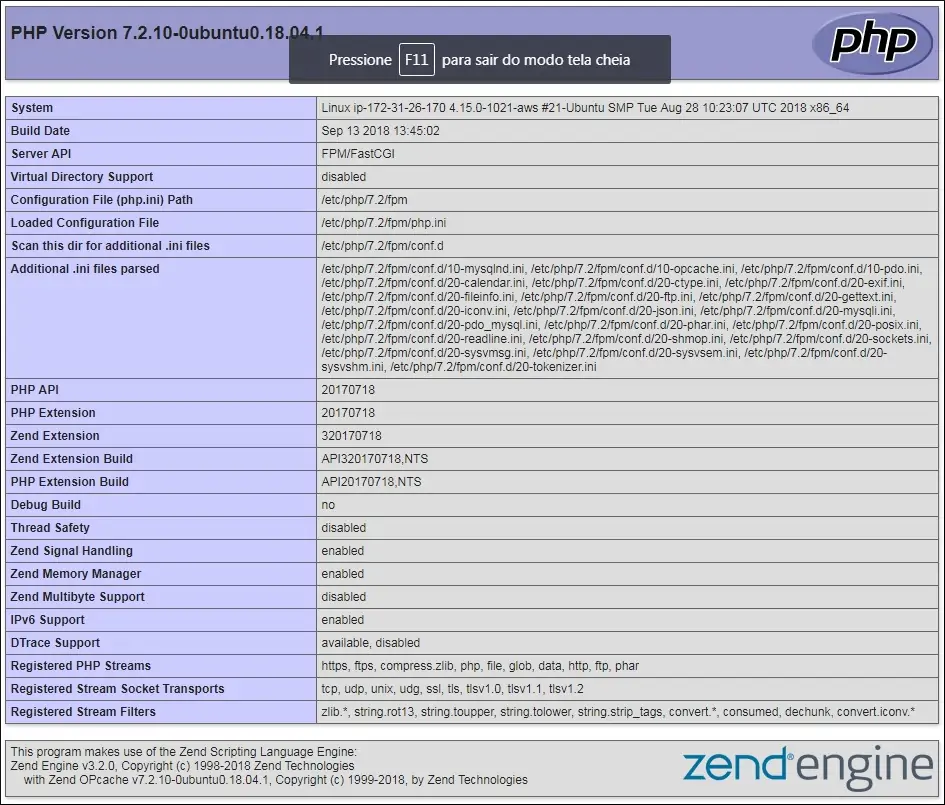
De PHP-informatiepagina moet worden gepresenteerd.


Leave A Comment
You must be logged in to post a comment.