Installing PhpMyAdmin on Ubuntu Linux
This tutorial will show you all the steps required to install PhpMyAdmin on Ubuntu Linux.
This tutorial was tested on Ubuntu 18.04.
1. Install MySQL on Ubuntu Linux
PhpMyAdmin requires a database system to store all its configuration.
Use the Ubuntu APT command to install the MySQL server.
# apt-get update
# apt-get install mysql-server mysql-client
Use the following command to access the MySQL service console.
# mysql -u root -p
Verify the authentication plugin being used by the MySQL root user.
use mysql;
SELECT user,authentication_string,plugin,host FROM user;
Set a password to the MySQL root user.
Configure the MySQL root user to authenticate using a password.
ALTER USER ‘root’@’localhost’ IDENTIFIED WITH mysql_native_password BY ‘kamisama123’;
FLUSH PRIVILEGES;
The MySQL root user is now configured to use password authentication.
In our example, we configured the MySQL password kamisama123.
Now, try to access the MySQL service using the new password.
# mysql -u root -p
2. Install Apache on Ubuntu Linux
PhpMyAdmin requires a web server with PHP support to present its web pages.
Use the Ubuntu APT command to install the Apache server.
# apt-get update
# apt-get install apache2 php7.2 php7.2-mysql libapache2-mod-php7.2
Install the Apache required PHP modules.
# apt-get install php7.2-json php7.2-gd php7.2-curl php7.2-mbstring
# apt-get install php7.2-zip libphp-jpgraph php-apcu php7.2-xml
Enable Apache mod_rewrite.
Edit the apache2.conf file.
# a2enmod rewrite
# vi /etc/apache2/apache2.conf
Add the following lines at the end of apache2.conf
<Directory /var/www/html>
AllowOverride All
</Directory>
Find the location of the PHP configuration file on your system.
Edit the php.ini configuration file.
# updatedb
# locate php.ini
# vi /etc/php/7.2/apache2/php.ini
Your PHP version may not be the same as ours.
Your PHP configuration file location may not be the same as ours.
Here is the file with our configuration.
file_uploads = On
max_execution_time = 300
memory_limit = 256M
post_max_size = 32M
max_input_time = 60
max_input_vars = 4440
Restart the Apache web server manually.
# service apache2 restart
# service apache2 status
Verify the Apache service status.
● apache2.service – The Apache HTTP Server
Loaded: loaded (/lib/systemd/system/apache2.service; enabled)
Drop-In: /lib/systemd/system/apache2.service.d
└─apache2-systemd.conf
Active: active (running) since Mon 2018-12-03 03:41:12 -02; 2 days ago
3. Install PHPMyAdmin on Ubuntu Linux
After finishing the MySQL and the Apache configuration, we can start the PhpMyAdmin installation.
Download the PhpMyAdmin latest version and extract the package.
# cd /tmp
# wget https://files.phpmyadmin.net/phpMyAdmin/4.8.4/phpMyAdmin-4.8.4-all-languages.tar.gz
# tar -zxvf phpMyAdmin-4.8.4-all-languages.tar.gz
Optional. Verify the PhyMyAdmin file integrity using the SHA256SUM command.
# wget https://files.phpmyadmin.net/phpMyAdmin/4.8.4/phpMyAdmin-4.8.4-all-languages.tar.gz.sha256
# sha256sum -c phpMyAdmin-4.8.4-all-languages.tar.gz.sha256
phpMyAdmin-4.8.4-all-languages.tar.gz: OK
Optional. Verify the PhyMyAdmin file integrity using the GPG command.
# wget https://files.phpmyadmin.net/phpMyAdmin/4.8.4/phpMyAdmin-4.8.4-all-languages.tar.gz.asc
# wget https://files.phpmyadmin.net/phpmyadmin.keyring
# gpg –import phpmyadmin.keyring
# gpg –keyserver hkp://pgp.mit.edu –recv-keys 3D06A59ECE730EB71B511C17CE752F178259BD92
# gpg –tofu-policy good CE752F178259BD92
# gpg –trust-model tofu –verify phpMyAdmin-4.8.4-all-languages.tar.gz.asc
gpg: assuming signed data in ‘phpMyAdmin-4.8.4-all-languages.tar.gz’
gpg: Signature made Tue Dec 11 02:06:39 2018 UTC
gpg: using RSA key 3D06A59ECE730EB71B511C17CE752F178259BD92
gpg: Good signature from “Isaac Bennetch <bennetch@gmail.com>” [full]
gpg: aka “Isaac Bennetch <isaac@bennetch.org>” [full]
gpg: bennetch@gmail.com: Verified 1 signature in the past 32 seconds. Encrypted 0 messages.
gpg: isaac@bennetch.org: Verified 1 signature in the past 32 seconds. Encrypted 0 messages.
Move the PhpMyAdmin folder inside your Apache root drive directory.
Give the www-data user full control over the PhpMyAdmin directory and its files.
# mv phpMyAdmin-4.8.4-all-languages /var/www/html/phpmyadmin
# chown www-data.www-data /var/www/html/phpmyadmin/* -R
4. Access PhpMyAdmin on Ubuntu Linux
Open your browser and enter the IP address your web server plus /phpmyadmin.
In our example, the following URL was entered in the Browser:
• http://200.200.200.200/phpmyadmin
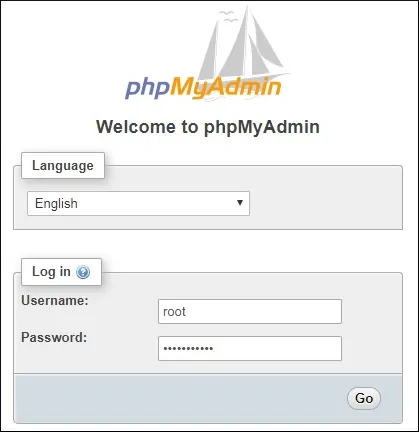
The PhpMyAdmin login screen will be presented.
On the Login screen, enter the MySQL root account and password.

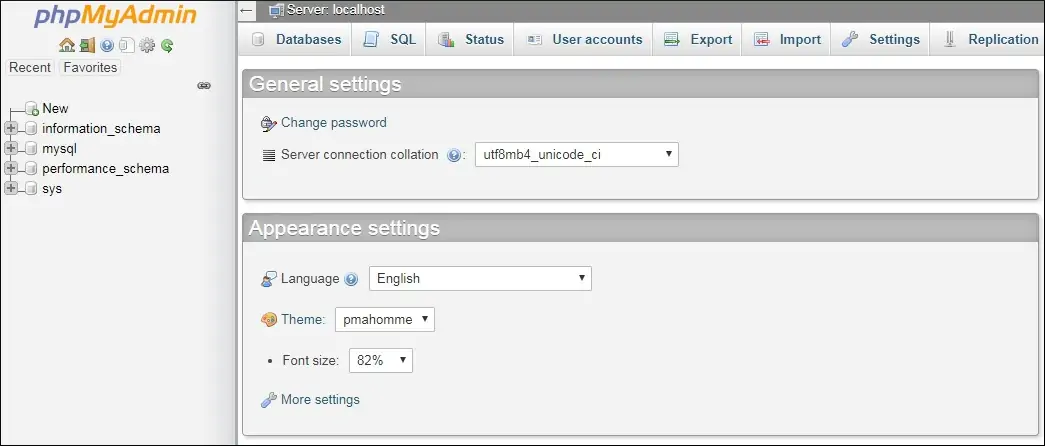
After a successful login, The PhpMyAdmin dashboard will be displayed.

Congratulations, PhpMyAdmin was installed on your system.
5. Secure the PHPMyAdmin Access
The PhpMyAdmin software offers a direct web interface to your MySQL database service.
Let’s add a layer of authentication to protect the initial access to PhpMyAdmin.
Create an Apache HTACCESS configuration file.
# vi /var/www/html/phpmyadmin/.htaccess
Here is the file with our configuration.
AuthType Basic
AuthName “PhpMyAdmin Access Restricted”
AuthUserFile /etc/phpmyadmin.htpasswd
Require valid-user
Give the www-data user full control over the Htaccess file.
# chown www-data.www-data /var/www/html/phpmyadmin/.htaccess
Create the Apache authentication file using the htpasswd command.
# htpasswd -c /etc/phpmyadmin.htpasswd admin
New password:
Re-type new password:
Adding password for user admin
In our example, we created a user named admin.
To create additional users, use the following command.
# htpasswd /etc/phpmyadmin.htpasswd vegeto
New password:
Re-type new password:
Adding password for user vegeto
Restart the Apache web server manually.
# service apache2 restart
Open your browser and enter the IP address your web server plus /phpmyadmin.
In our example, the following URL was entered in the Browser:
• http://200.200.200.200/phpmyadmin
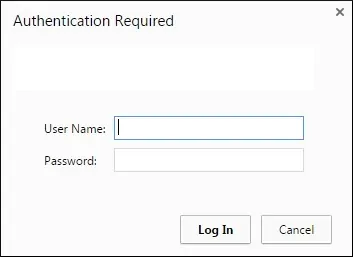
The Apache server will present an authentication form.

After a successful login, The PhpMyAdmin login screen will be presented.

After a successful login, The PhpMyAdmin dashboard will be displayed.

Leave A Comment
You must be logged in to post a comment.